

In the quiz, go to “Settings” → “Integrations” and click “Connect” on the Bitrix24 card.
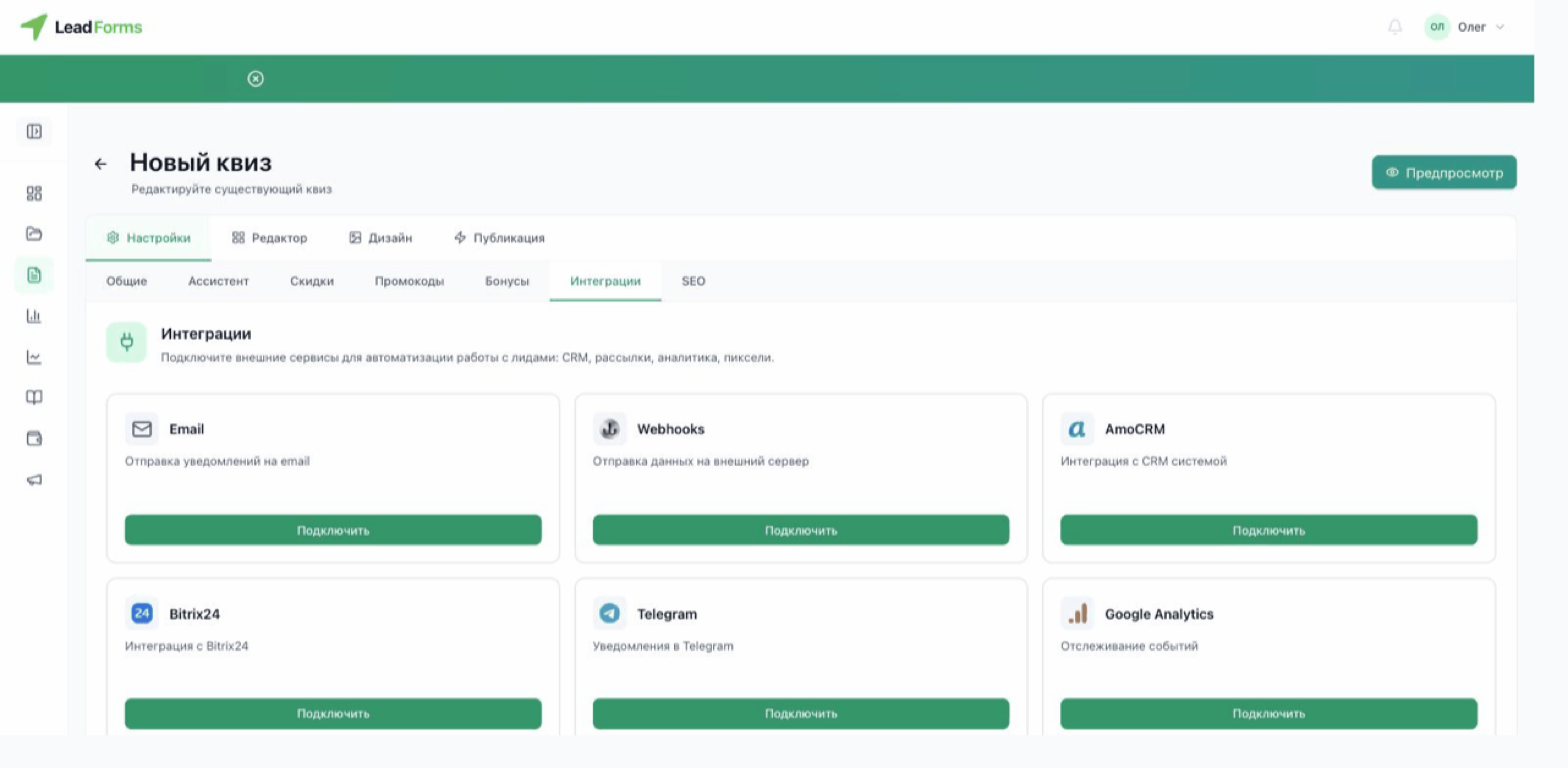
Copy your Bitrix24 domain from the address bar
In your Bitrix24 portal, copy the domain from the browser address bar: it is the part of the address up to the first slash, such as
b24-xxxxxx.bitrix24.com.
Paste the domain into the Bitrix24 URL field
Go back to the Bitrix24 card in “Integrations” and paste the domain into the “Your Bitrix24 URL” field.
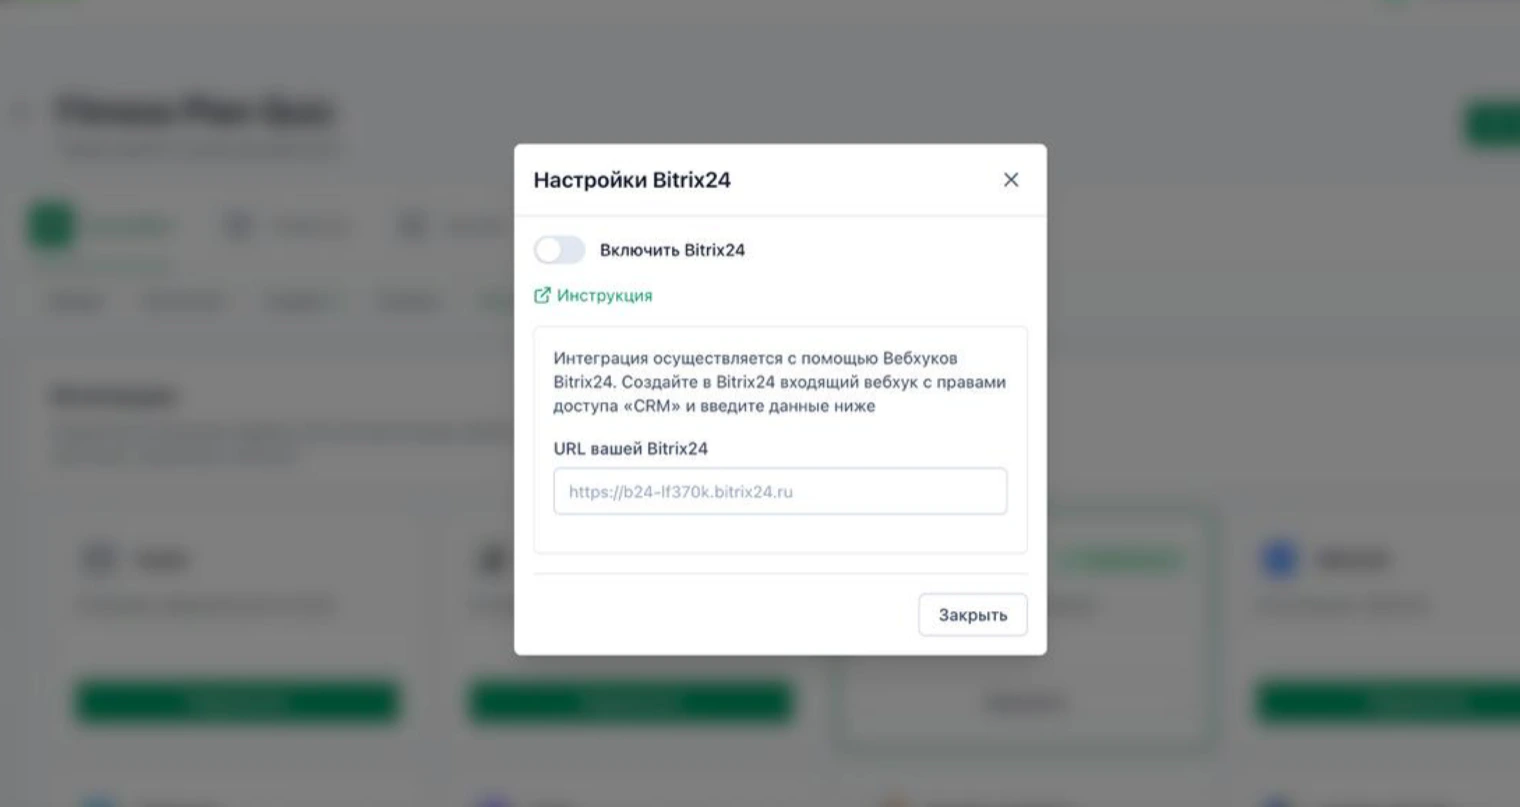
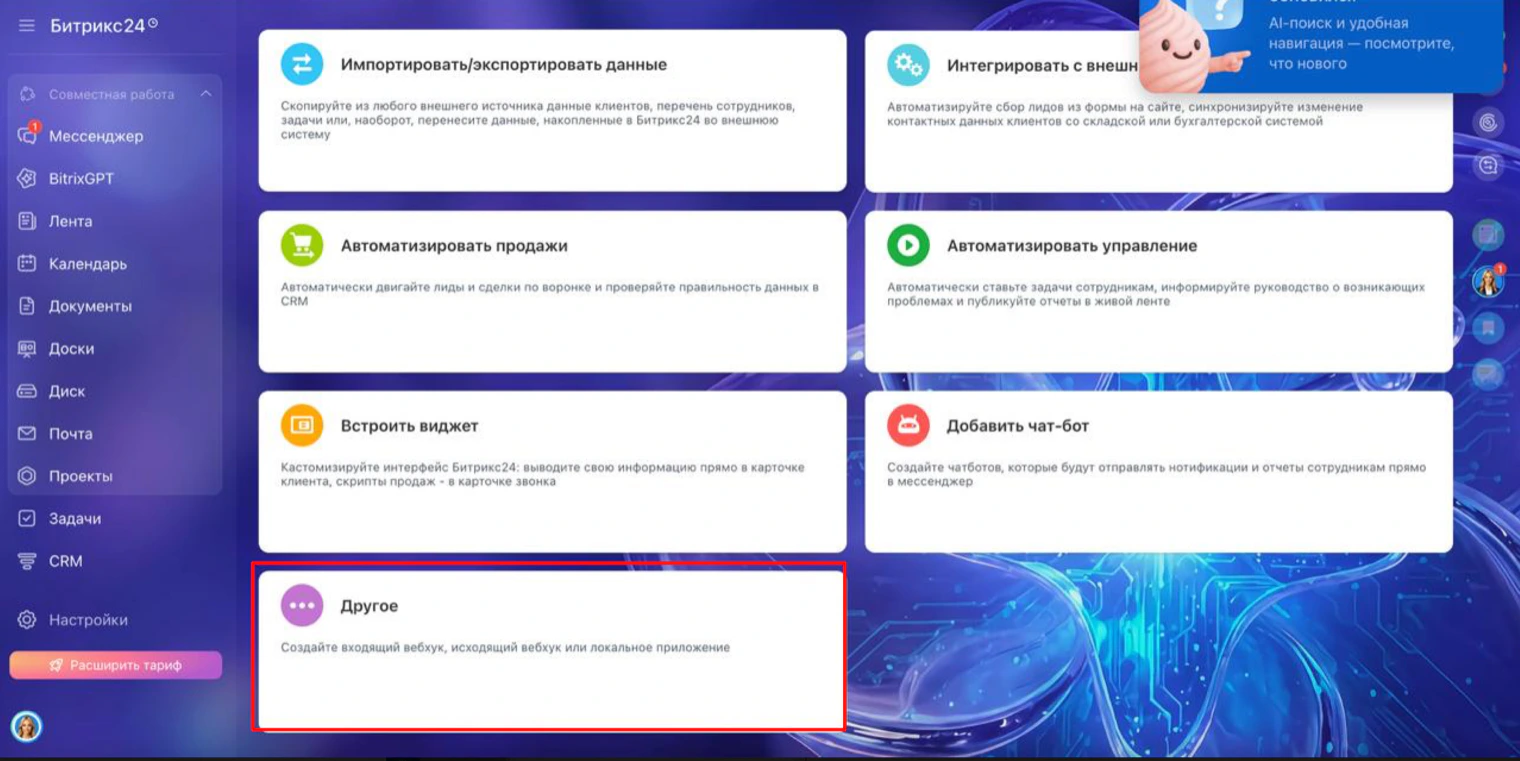
Open the link in the window and click “Other”
Once you enter the domain, a direct link appears for creating the webhook in your portal. Open it: the Bitrix24 “Developers” section opens. Choose the “Other” card.
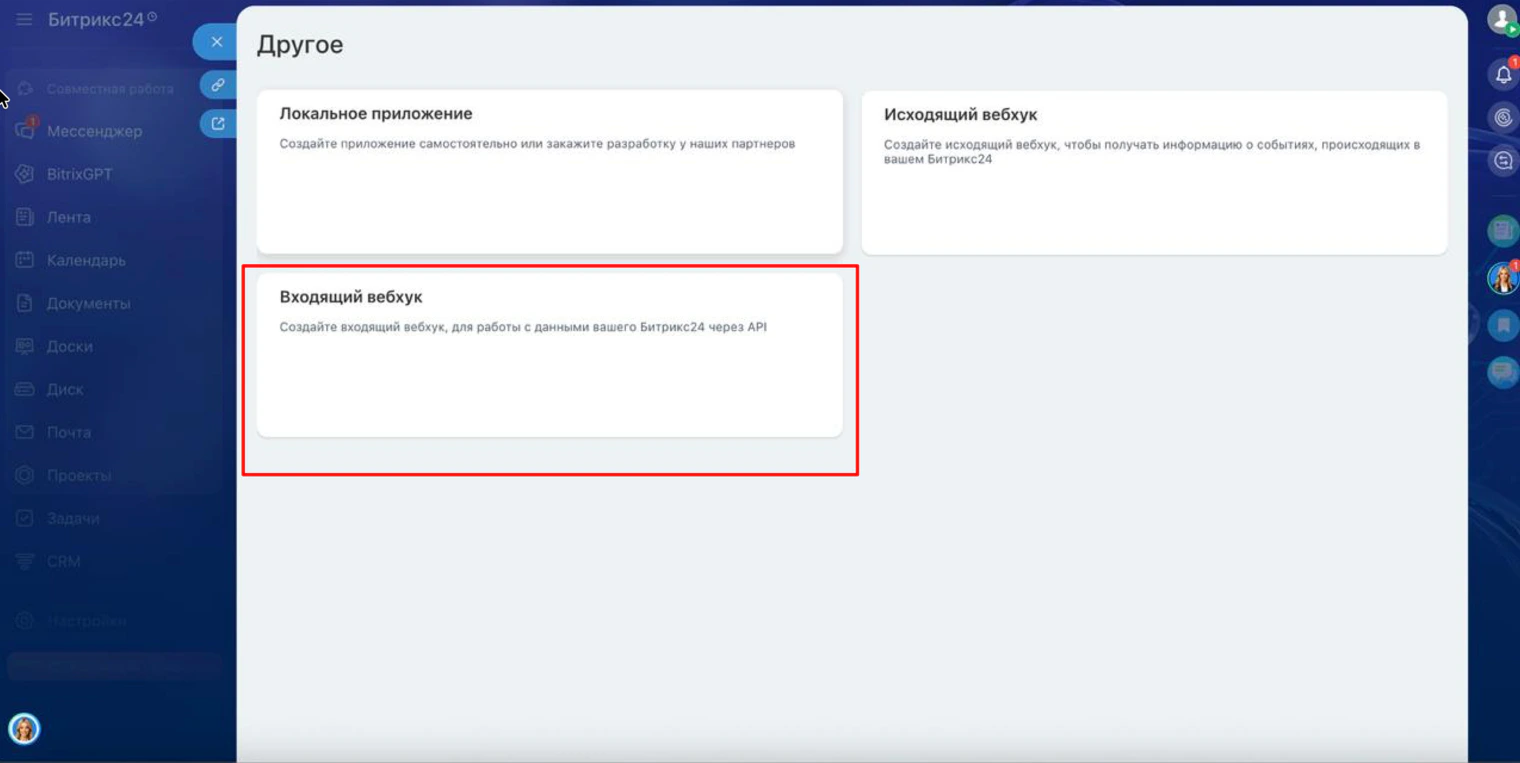
Choose “Inbound webhook”
The “Other” window has three cards. The one you need is “Inbound webhook”, not the outbound one: that one works the other way around, sending events from Bitrix24.
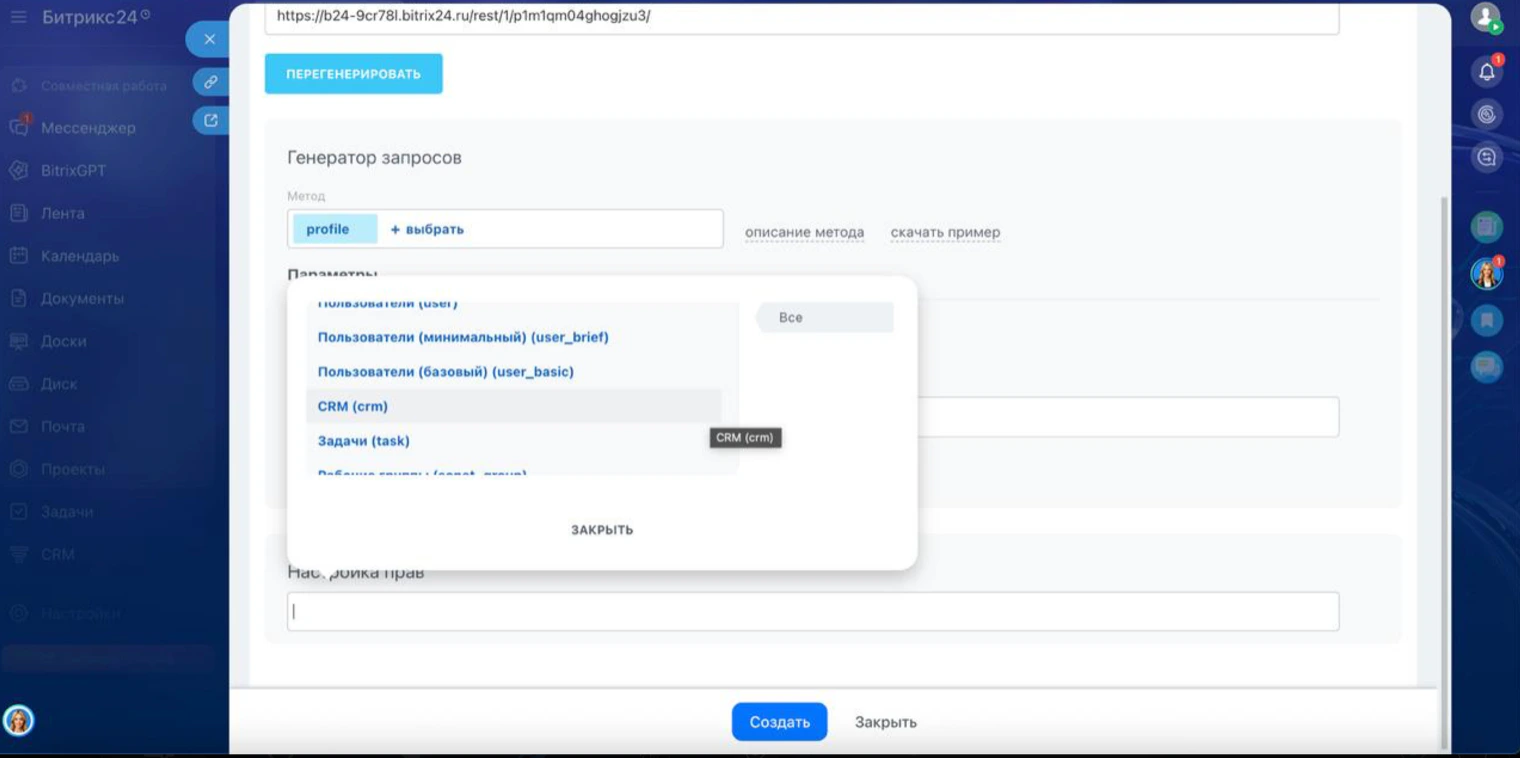
In the permissions, choose “CRM” and create the webhook
Click the permissions field: a list drops down. Choose CRM (crm) and click “Create”.
Copy the webhook URL
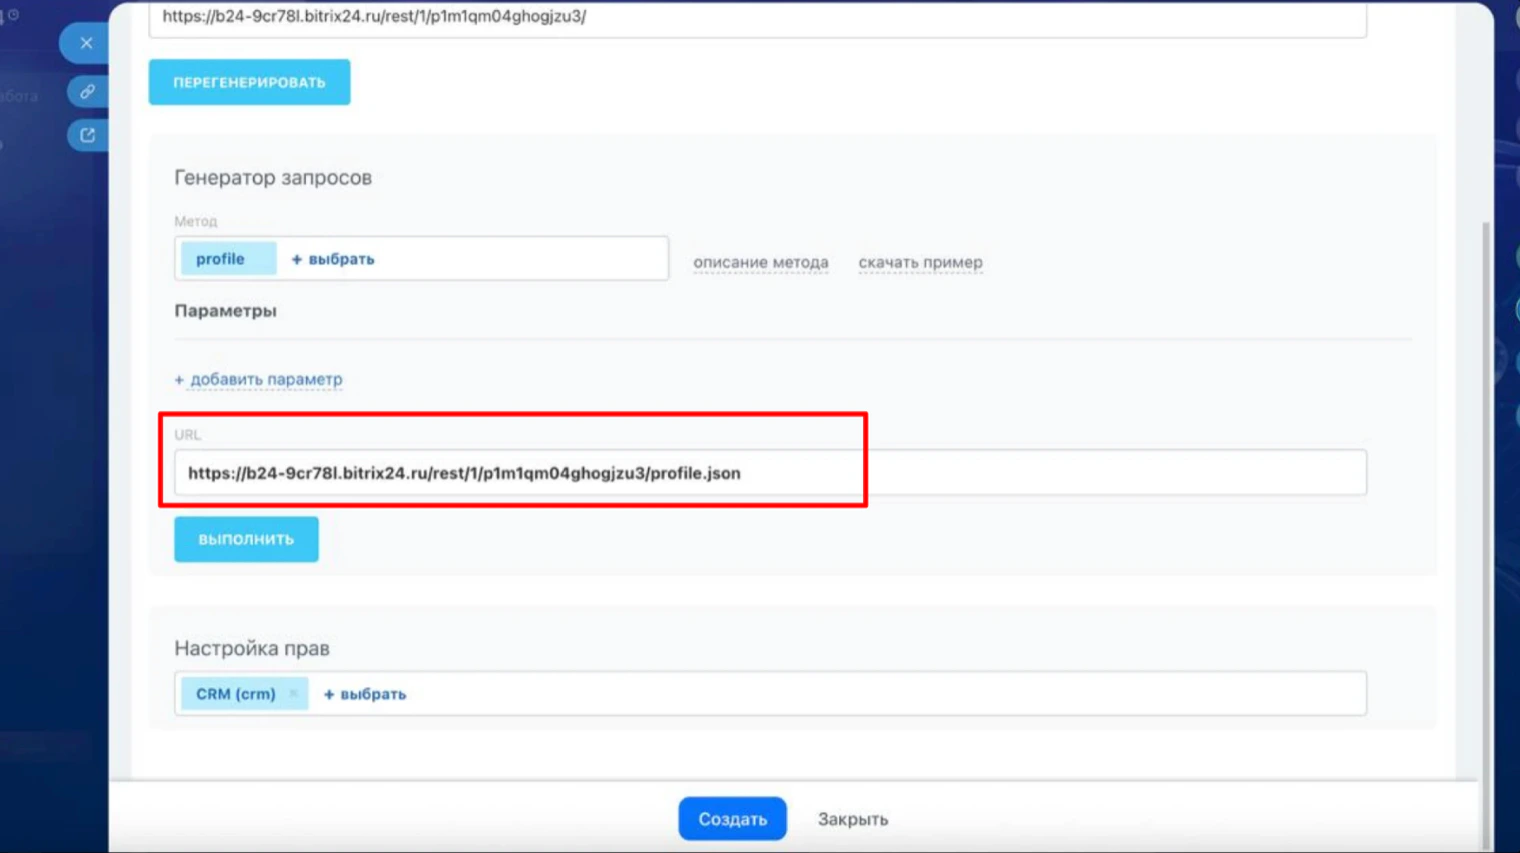
The address is in the “Request builder” block, in the URL field. It looks like this:
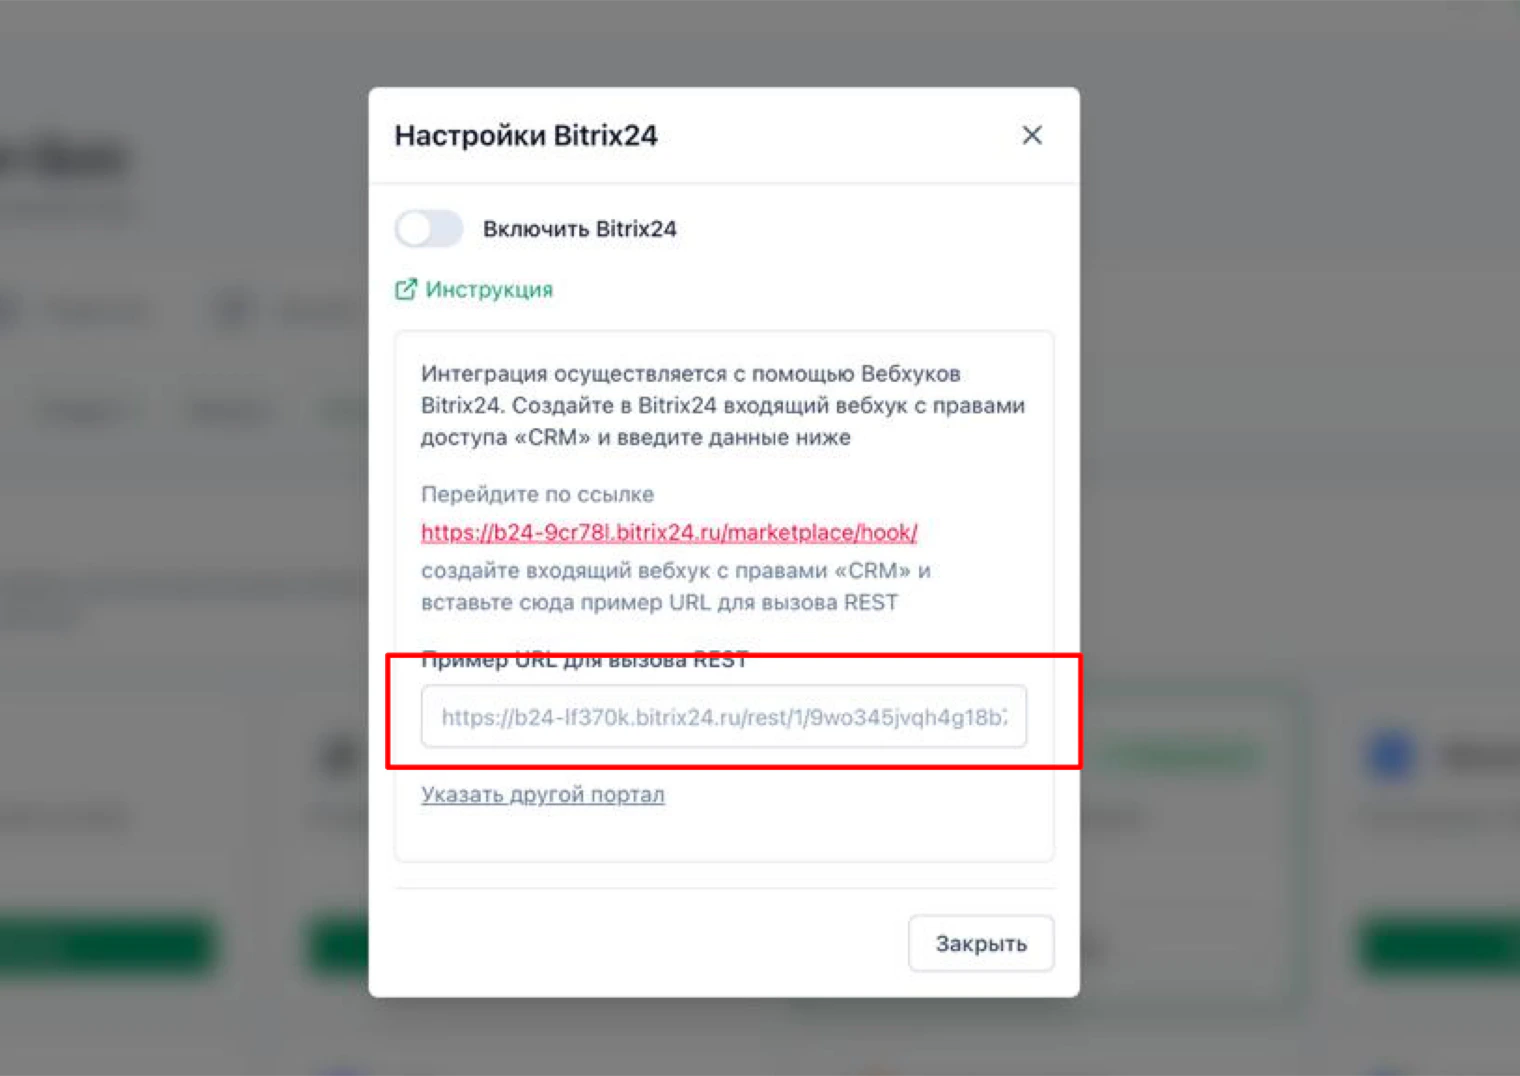
This is exactly what LeadForms calls “Sample URL for the REST call”.
https://your-portal.bitrix24.com/rest/1/xxxxxxxx/profile.json.This is exactly what LeadForms calls “Sample URL for the REST call”.
Paste the REST address into the settings
Go back to the Bitrix24 settings in LeadForms and paste the address into the “Sample URL for the REST call” field.
The domain, authorization code and user ID fill in automatically, so you do not need to type them. If the domain is wrong, change it with the link for specifying another portal.
The domain, authorization code and user ID fill in automatically, so you do not need to type them. If the domain is wrong, change it with the link for specifying another portal.
How to find the responsible user ID
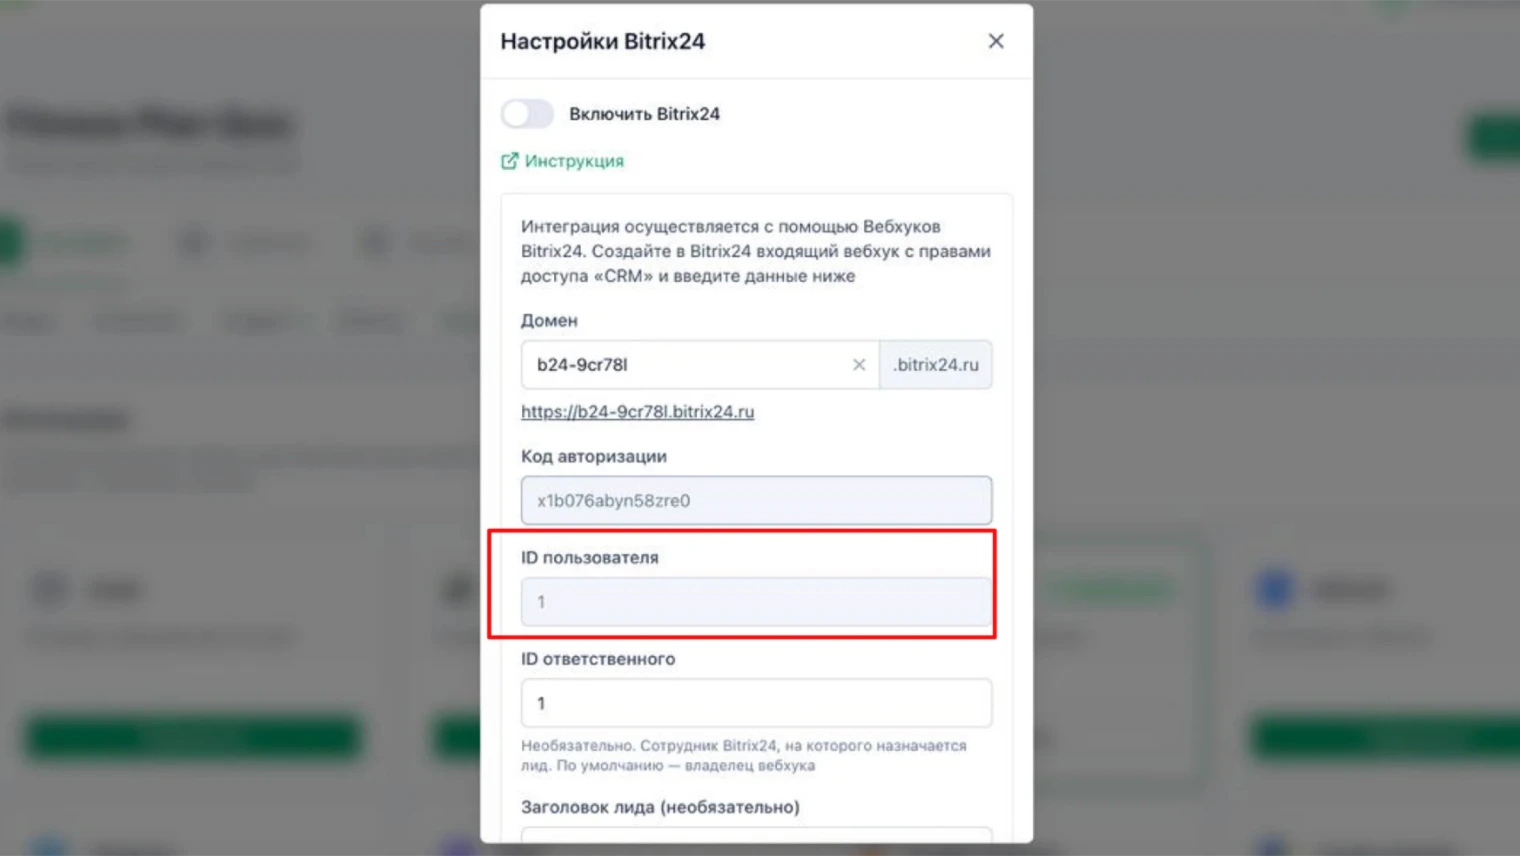
Open that person's profile in Bitrix24 and look at the number at the end of the address:
/company/personal/user/1/. In the screenshot, it is number 1.
Set the responsible user and turn on the integration
Paste that ID into the “Responsible user ID” field: this is the Bitrix24 user the leads are assigned to. The field is optional; if you leave it empty, leads go to the webhook owner. Below it, you can set the lead title.
Turn on the “Enable Bitrix24” switch and save: without it, the integration does not work.
Done! The integration is set up.
Turn on the “Enable Bitrix24” switch and save: without it, the integration does not work.
Done! The integration is set up.
Stuck with the setup?
If something does not work, and we will sort it out with you.
