

Four ways to put a quiz on a Wix website
1. Floating button
2. Pop-up banner
3. Widget
4. Auto-open: the quiz opens on its own or when someone tries to leave the site
The first three are set up the same way; auto-open is set up separately.
2. Pop-up banner
3. Widget
4. Auto-open: the quiz opens on its own or when someone tries to leave the site
The first three are set up the same way; auto-open is set up separately.
Choose the format and set it up
In the quiz editor, open “Publish” → “On website” and choose how you want to add it: button, banner or widget. Below that, you adjust how it looks.
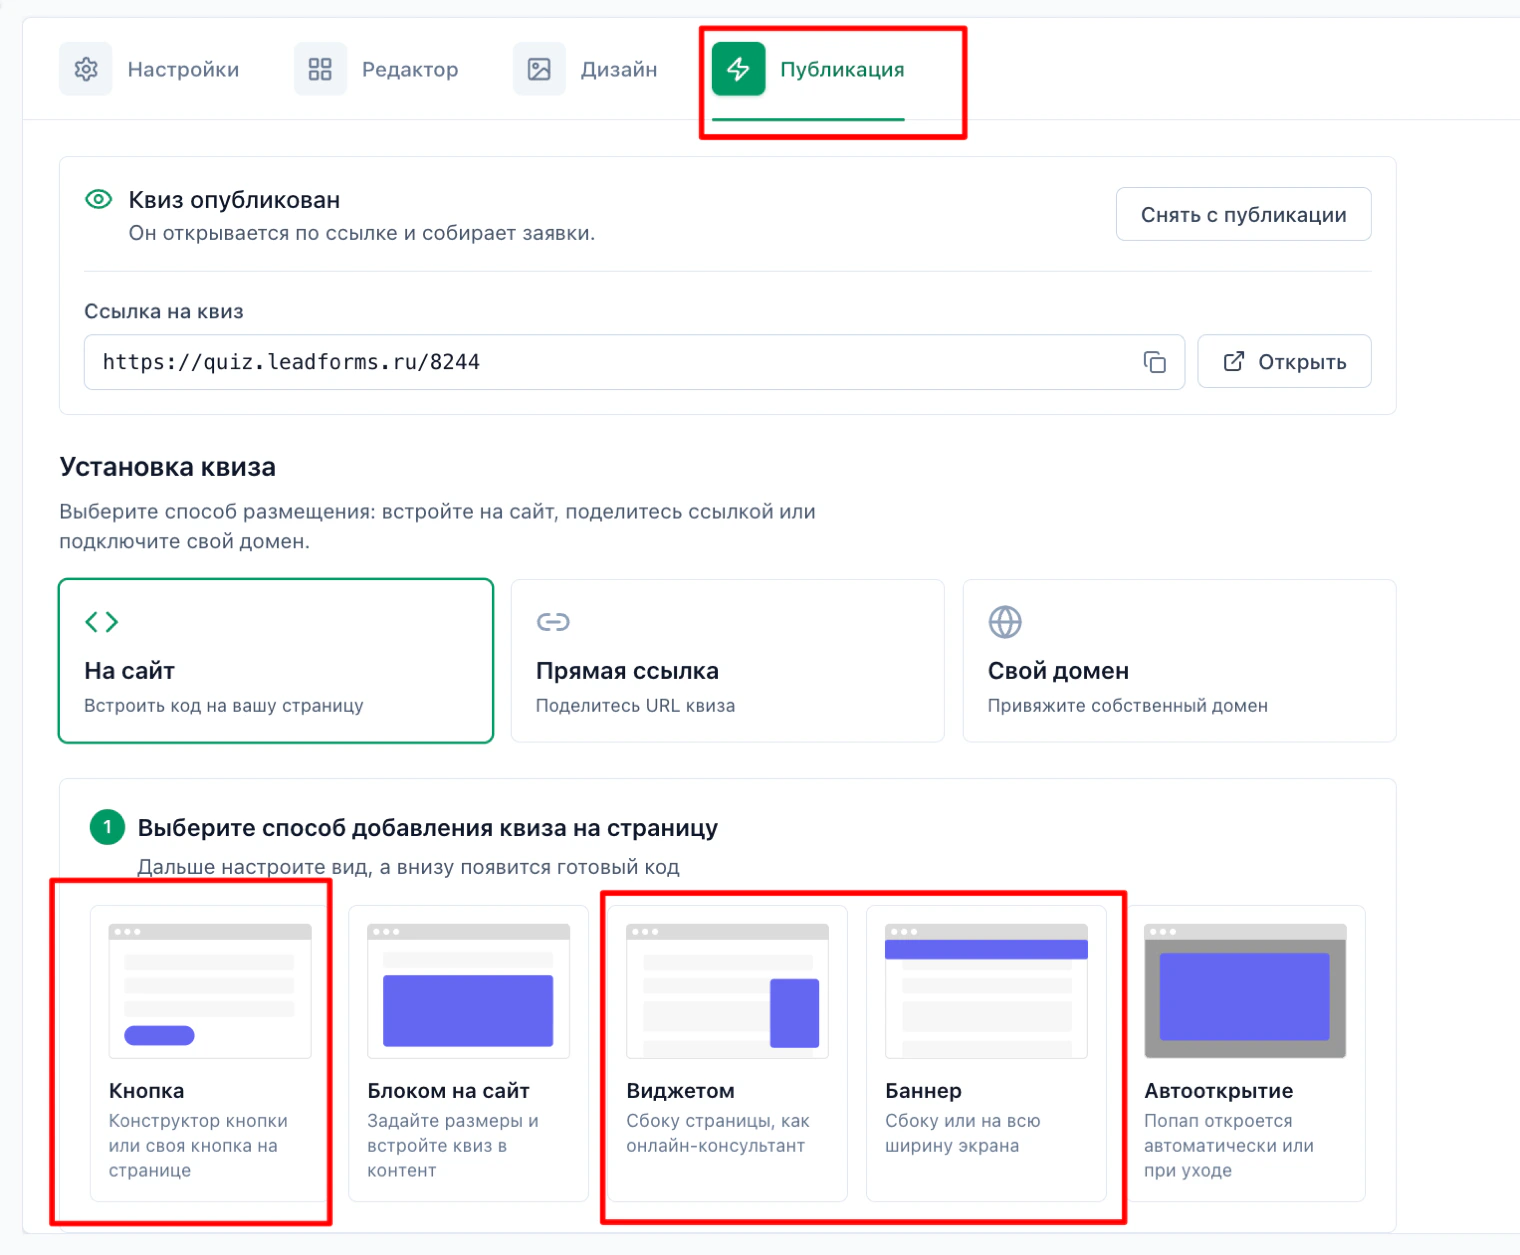
Copy the initialization code
When it looks the way you want, click “Copy” under the code for the
<head> block. You only need this script once for the whole site: if it is already on your pages, do not add it again.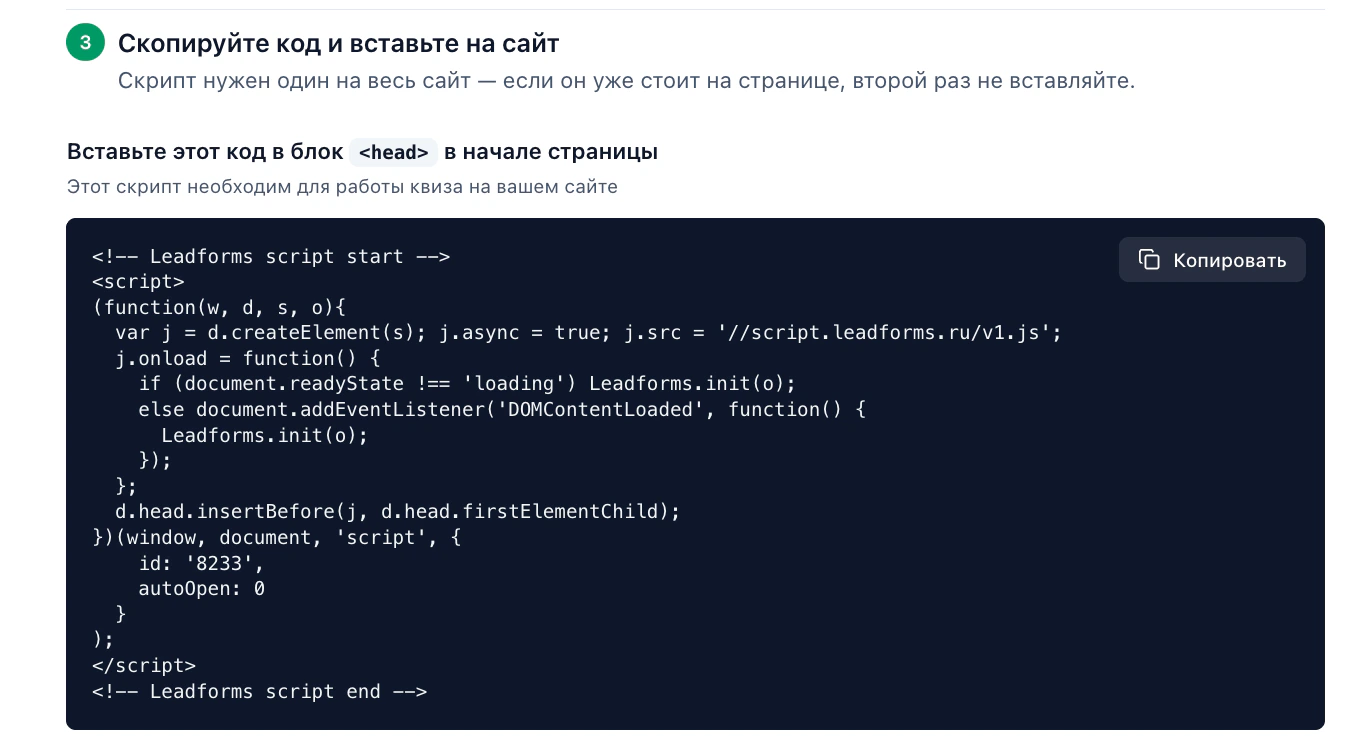
In Wix, open “Settings” → “Custom Code”
The section is at the bottom of the side menu, under “Settings”, and inside it, in the “Advanced” group, you will find “Custom Code”. From there, the code goes into the site header, that is, the
Learn more about custom code in the Wix Help Center.
<head> container.Learn more about custom code in the Wix Help Center.
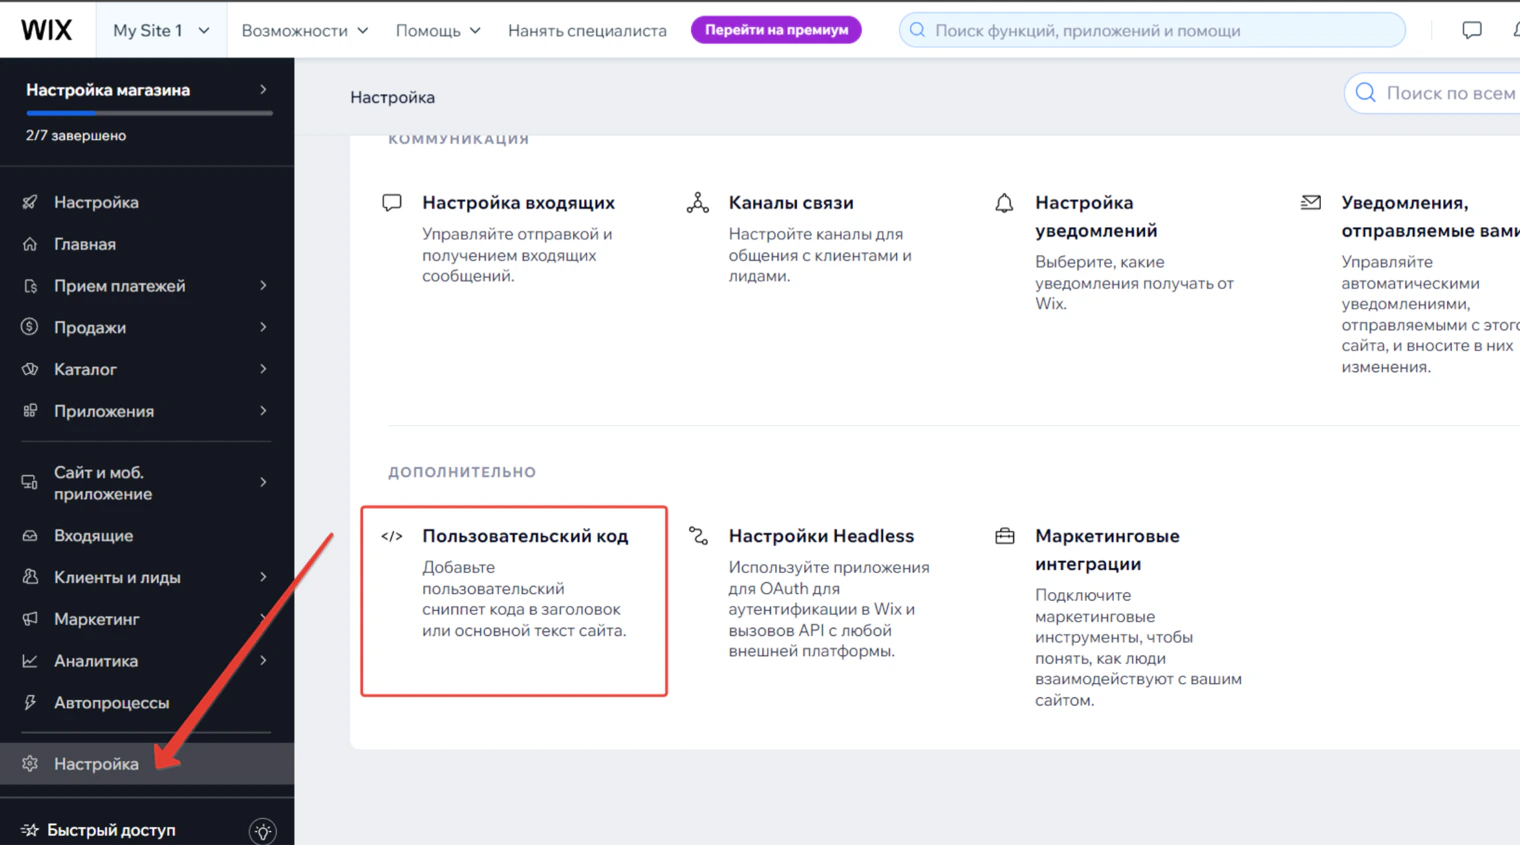
Click “Add Custom Code”
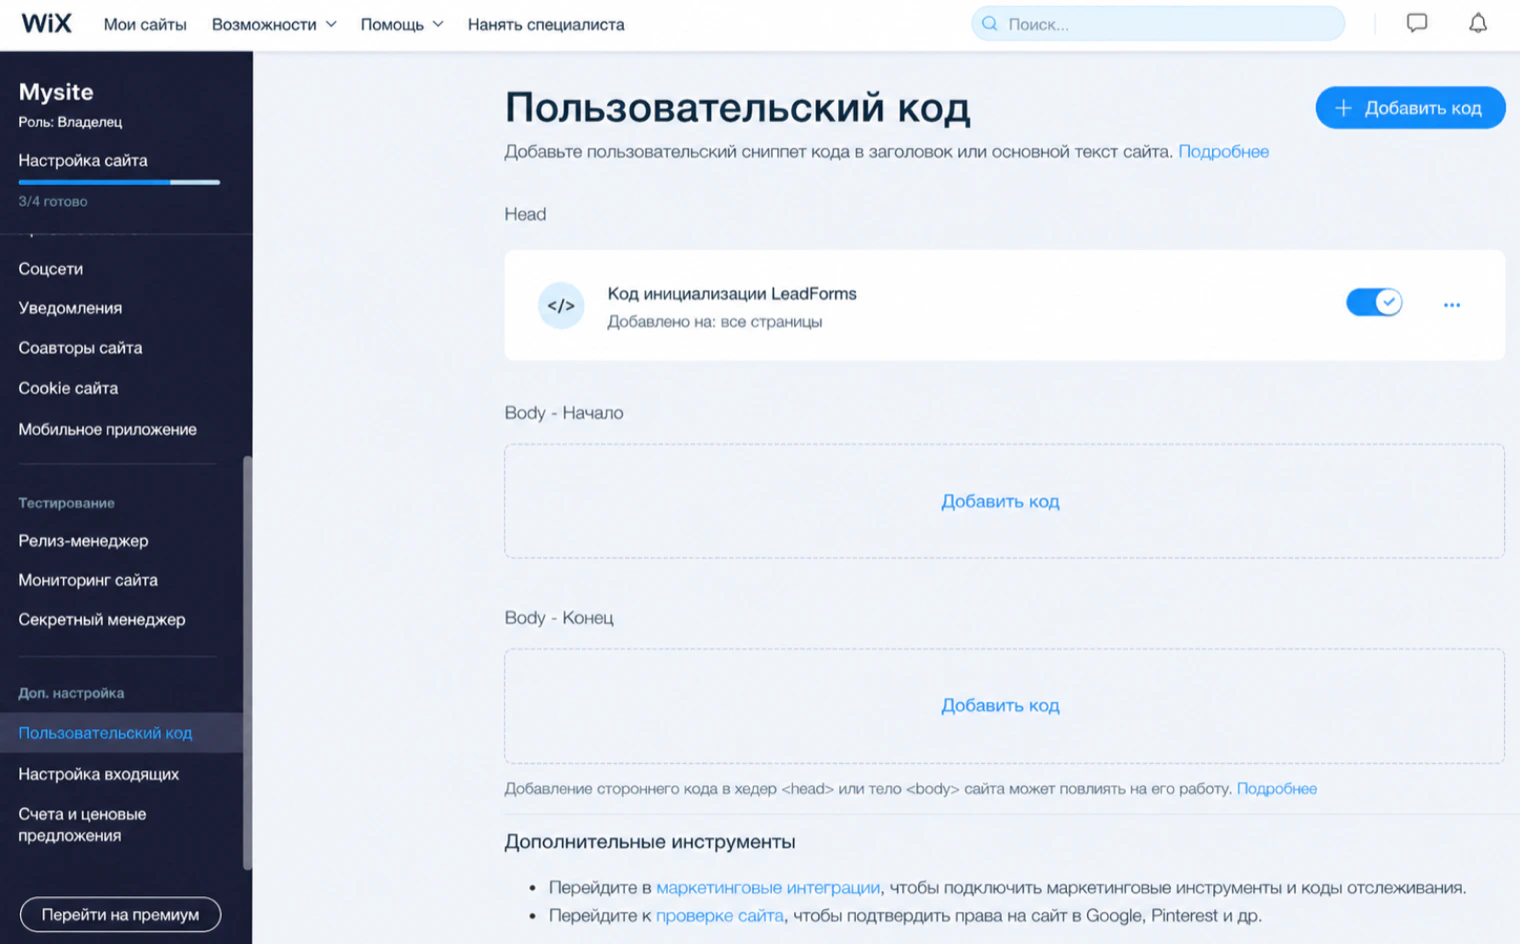
That screen has three areas: Head, Body - start and Body - end. The initialization code goes in Head: click “Add Code” in that area, or the “Add Custom Code” button at the top right.
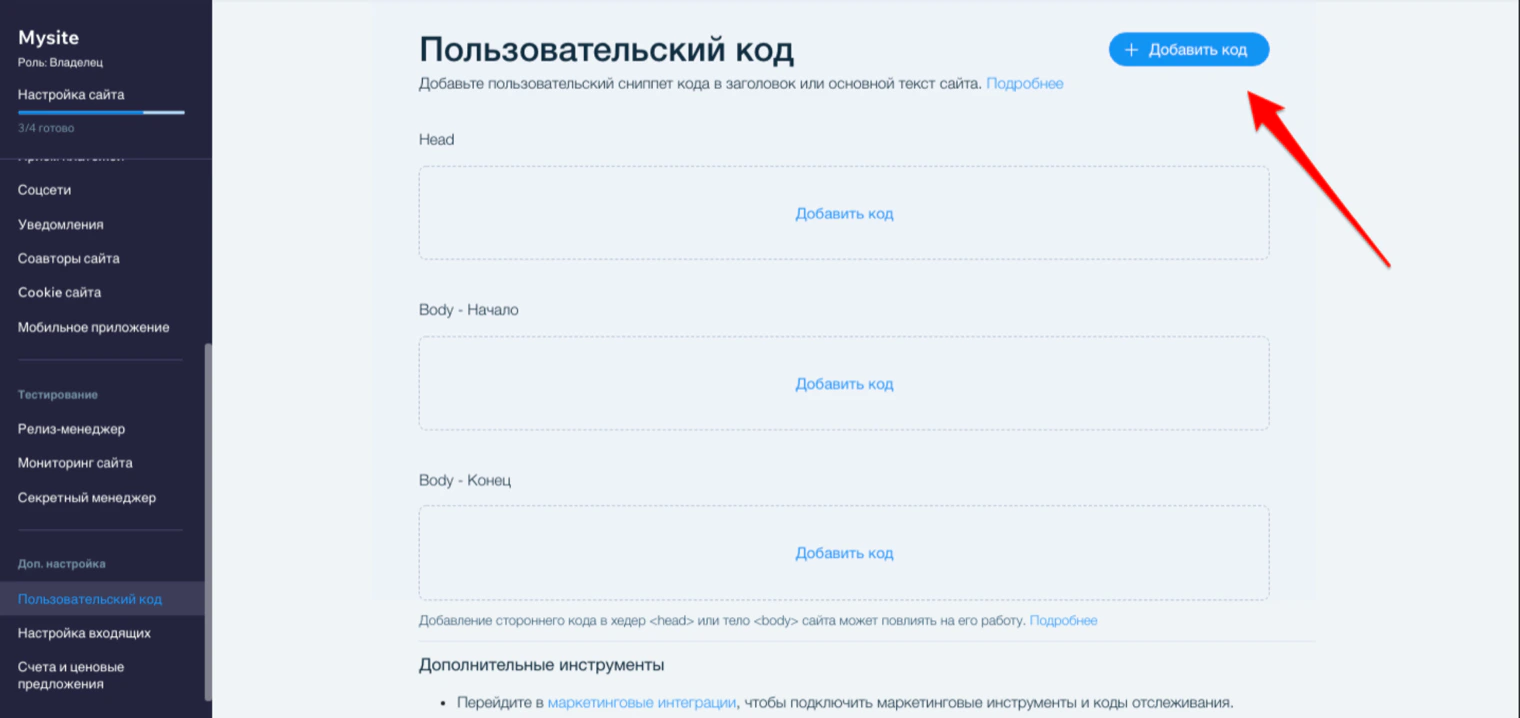
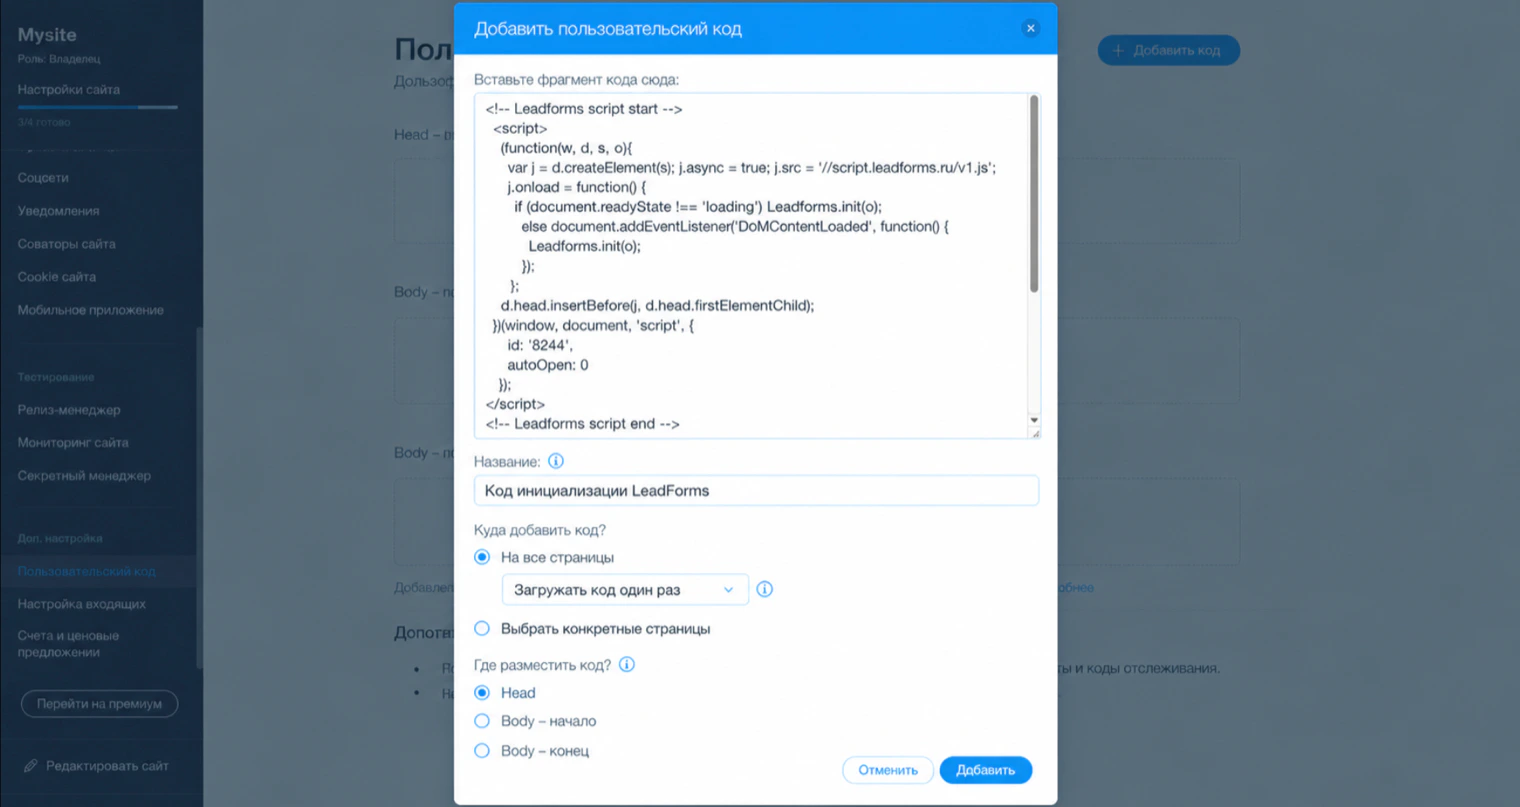
Paste the code and make sure “Head” is selected
Paste the initialization code into the code field and give it a clear name, for example “LeadForms initialization code”.
Under “Place Code in”, Head must be selected, and under “Add Code to Pages”, “All pages”. Click “Apply”.
Under “Place Code in”, Head must be selected, and under “Add Code to Pages”, “All pages”. Click “Apply”.
Go back to LeadForms and copy the second code
Below the script for the
<head> block there is a second code, “Paste this code anywhere on the page”. It is the code for the format you chose: button, banner or widget. Click “Copy”.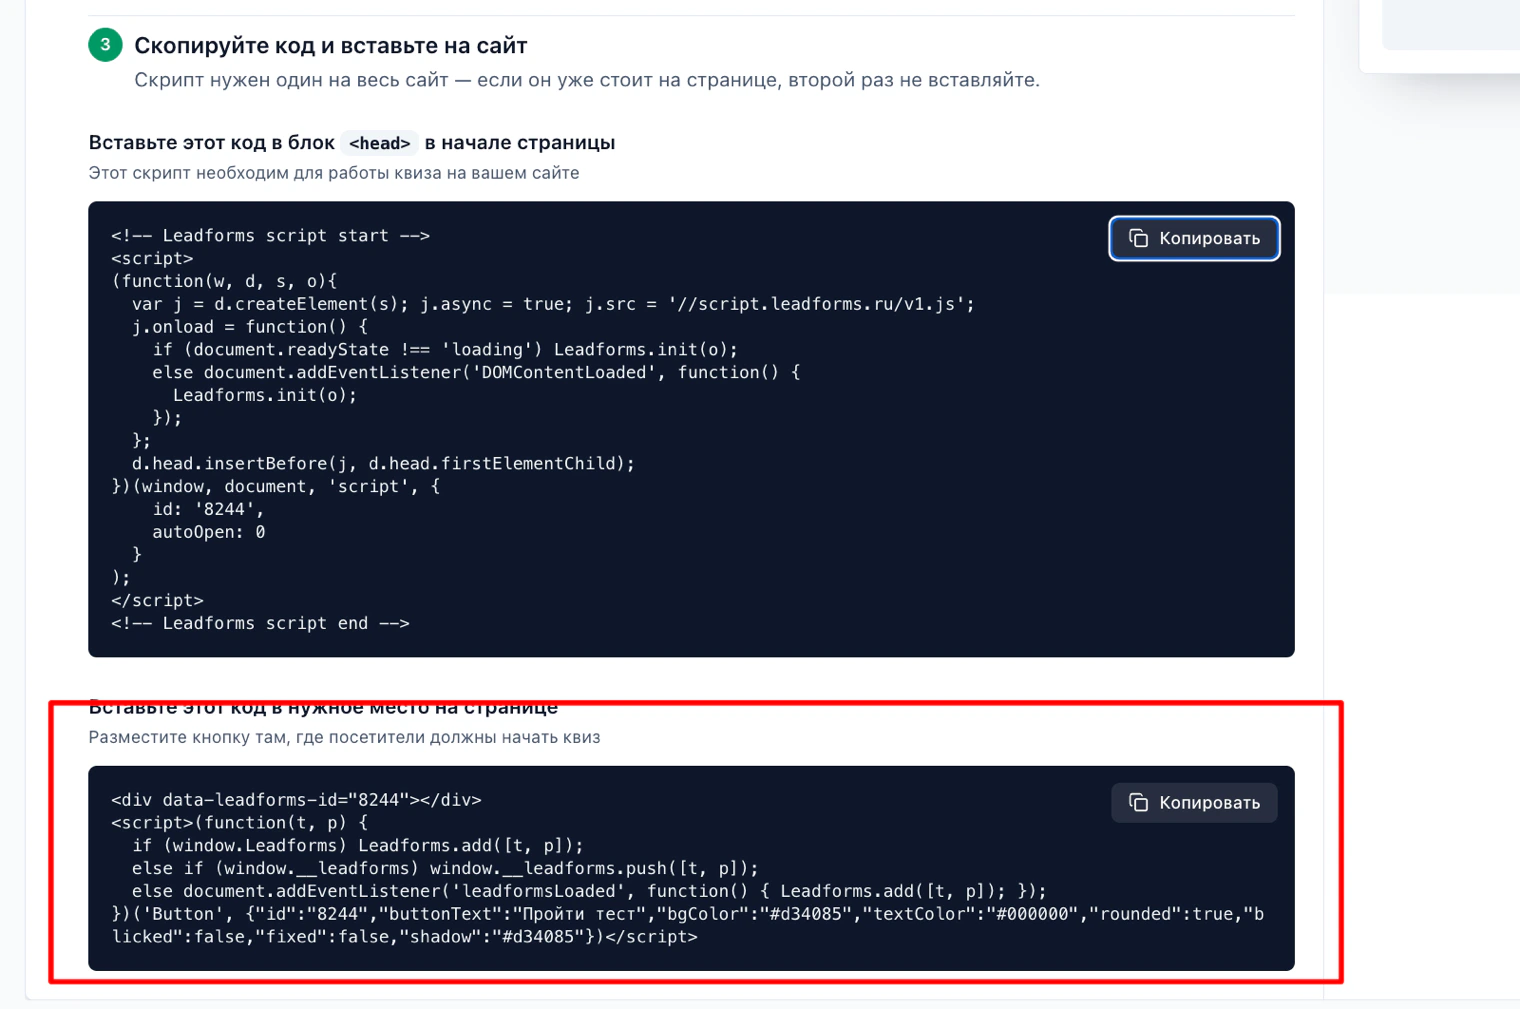
Paste the second code into
<body>Go back to Wix, to “Settings” → “Custom Code”, and click “Add Custom Code”.
In the Head area you can already see the initialization code you added: leave it as is.
In the Head area you can already see the initialization code you added: leave it as is.
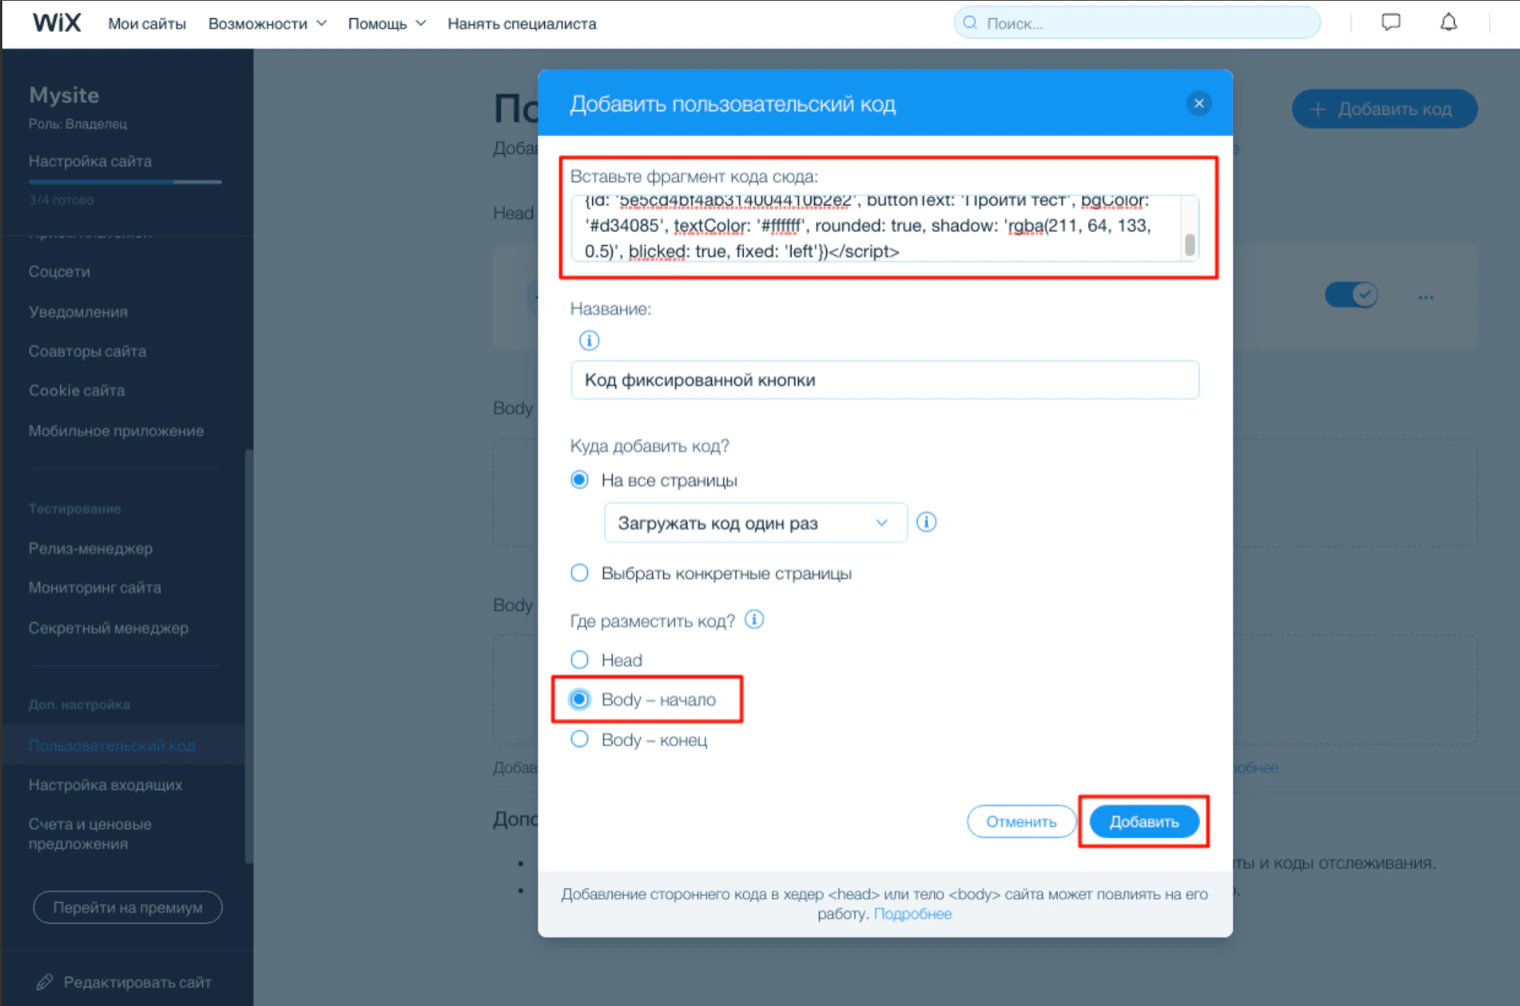
Paste the code and choose “Body - start”
Paste the button, banner or widget code into the code field and give it a name, for example “Floating button code”.
Under “Place Code in”, choose “Body - start” and click “Apply”.
Under “Place Code in”, choose “Body - start” and click “Apply”.
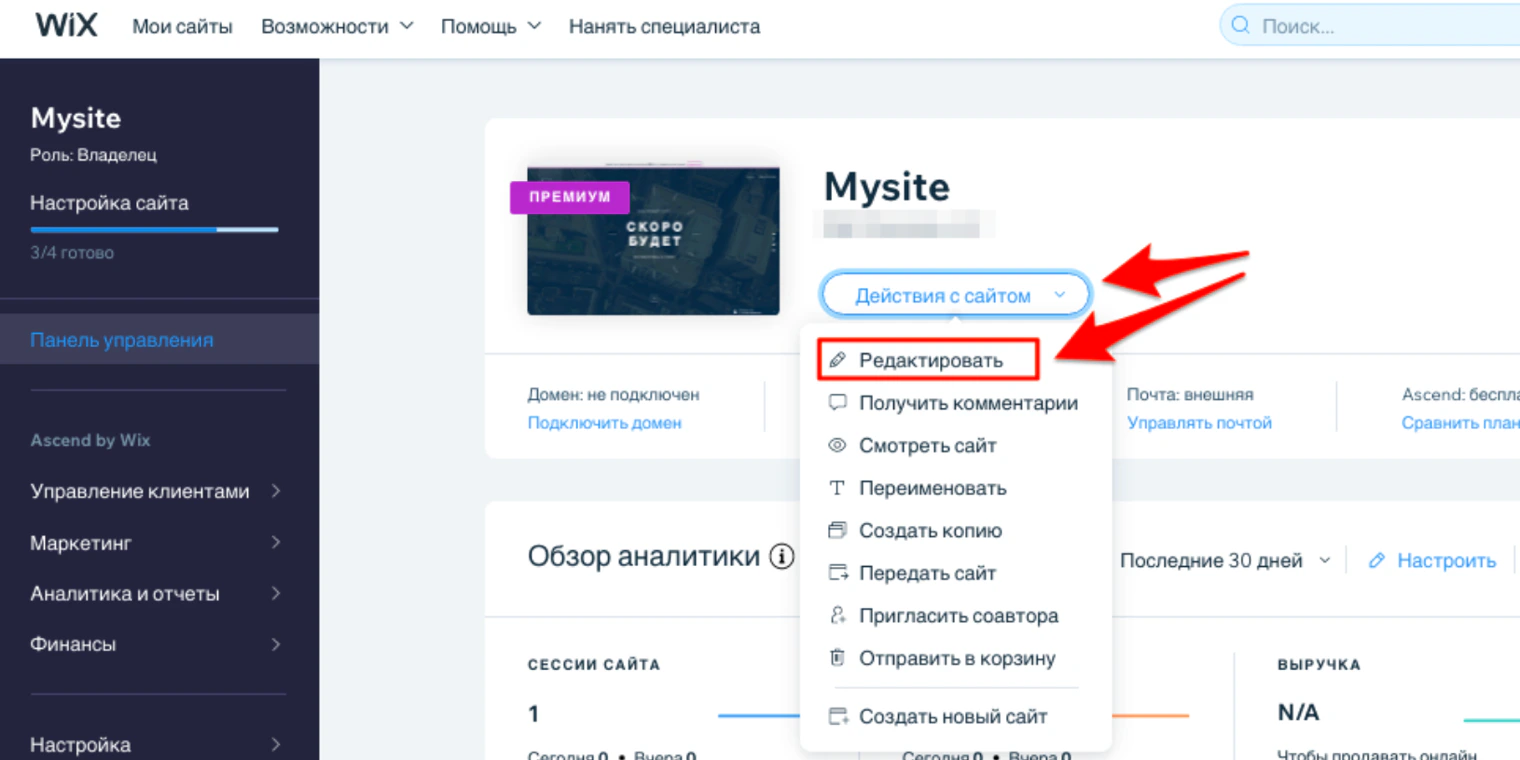
Leave the settings: “Site Actions” → “Edit Site”
The code is in place; now you need to go back to the editor. In the dashboard, click “Site Actions” and choose “Edit Site”.
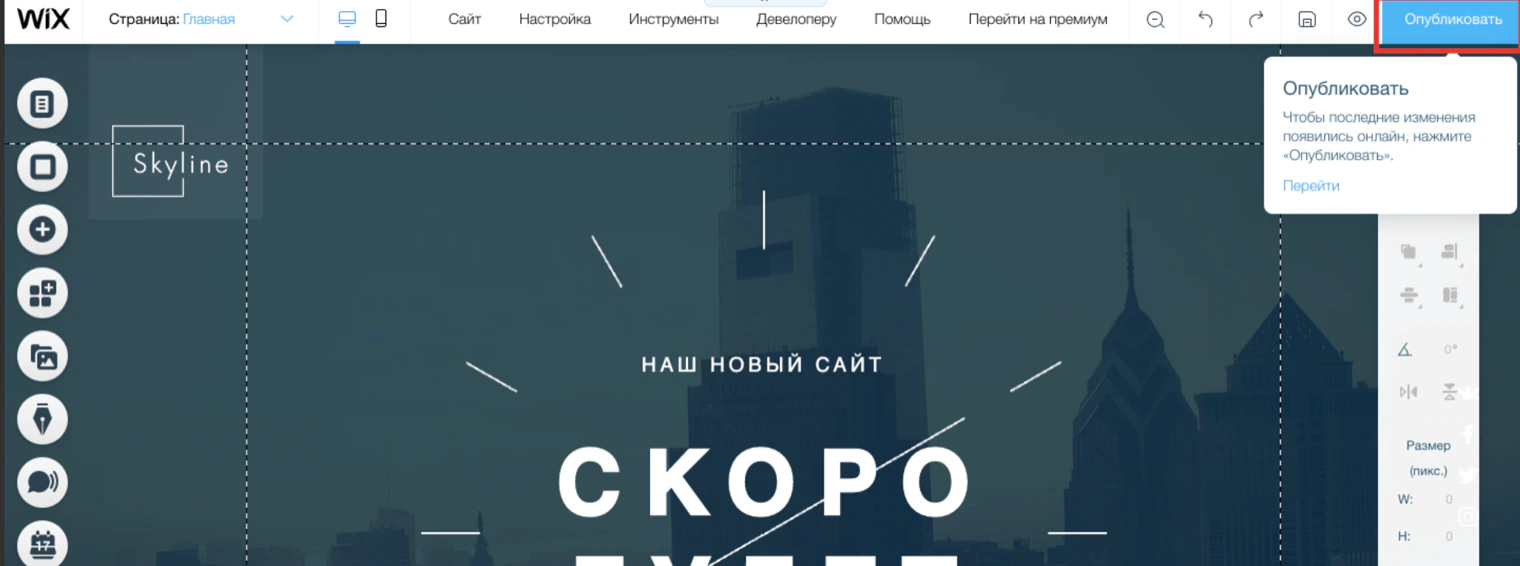
Click “Publish”
The button is at the top right of the editor. Until the site is published, the changes are only visible there.
Done! The quiz is in place.
Done! The quiz is in place.
The fourth way: auto-open
If the quiz should open on its own, right away, after a while or when someone tries to leave the site, choose the “Auto-open” mode on the “Publish” tab and adjust the settings.
Then copy the initialization code and paste it into the
Then copy the initialization code and paste it into the
<head> container, just like in steps 4 to 6 above. You do not need the second code here: there is no button on the page, the quiz opens by itself.Stuck with the setup?
If something does not work, and we will sort it out with you.
