

Add a second contact form
The rejection page is tied to its own contact form. Open the quiz and go to the “Editor” tab → the “Contact form” step → the “Add form” button.
Set when a request is rejected
Open the new form, go to the “Conditional logic” tab → turn on “Show the form only if a condition is met” and specify the question and answer (or the quiz result) that should lead to a rejection. Conditions are explained in the “Contact form based on answers” guide.
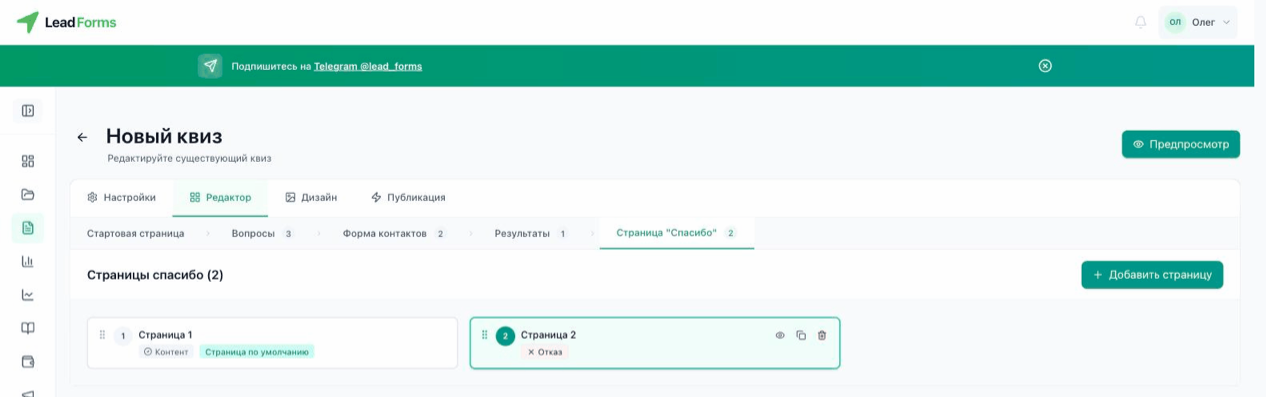
Go to the “Thank-you page” step
Each form has its own final page, so now there are two. The first goes with the first form, and the second with the form that has the condition.
Choose the “Rejection page” type
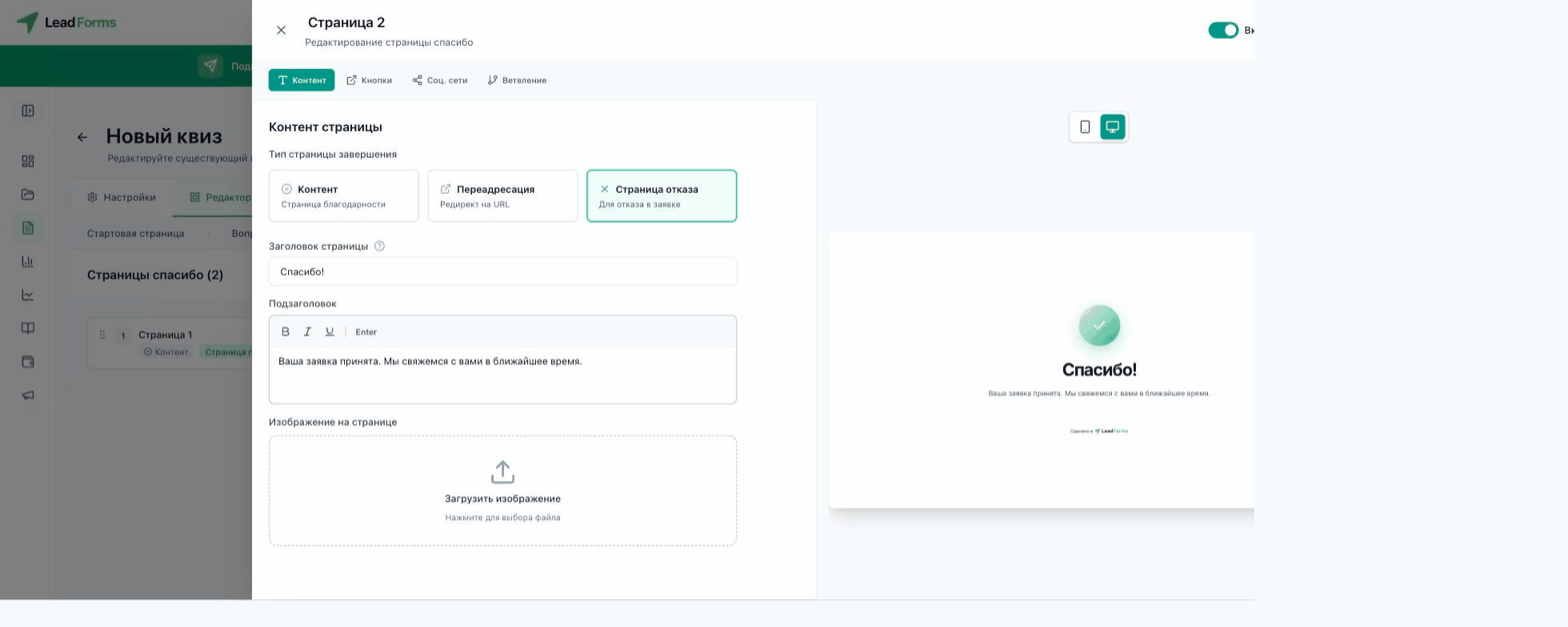
Open the second thank-you page and, on the “Content” tab, in the “Final page type” block, choose “Rejection page” (instead of “Content” or “Redirect”). Add a headline, a subheadline and, if you like, an image, just as on a regular thank-you page.
Done
From then on, anyone who meets the rejection condition sees your rejection page instead of the form and the thank-you page, and is not asked for any details.
